Viewing entries tagged
dead simple

2 Comments

The Basics No. 6: Jumbo Savory Chickpea-Rice Pancake

Hey, welcome. Consider following MSV on Twitter and subscribing to the RSS feed, or sign up for email updates right over here.

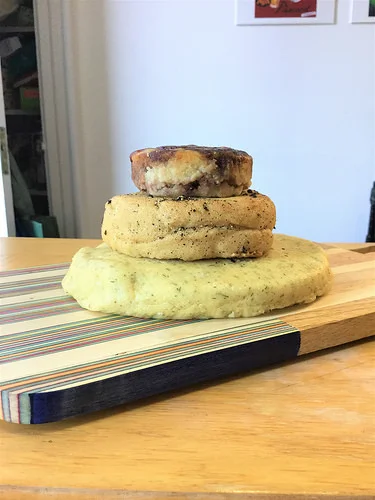
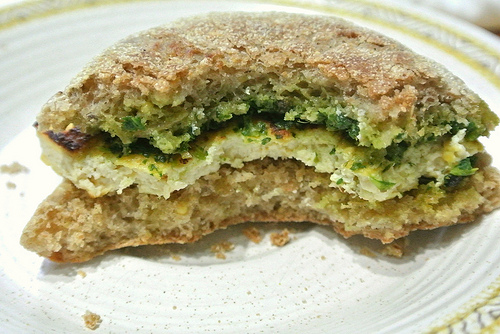
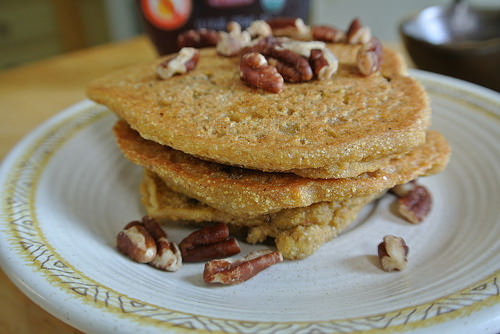
Happy 2018, friends! If you're struggling with a return to routine, let me introduce you to one of the easiest, most reliable dinners out there: this huge, fluffy, savory pancake made from chickpea and white rice flours. It's tasty, filling, and ready in minutes. It's made entirely from things you keep on the pantry shelf and studded with frozen peas that keep for ages in the freezer.

Whatever project you have going on, all you need is a 10-minute break to make sure you're fed and nurtured. Let's get cooking.

Anyone who's ever had a dosa knows how pleasantly crispy white rice flour cooks up in a hot skillet. You'll get that great magic on the edges, but the bulk of this guy is soft from the combination of rice flour and chickpea flour, seasoned with nutritional yeast and—for bananas-convenient flavor—a little spoonful of vegetable broth powder (check your local co-op's bulk section). You can always toss in some garam masala or garnish with fresh herbs, but the basic recipe is good to go.

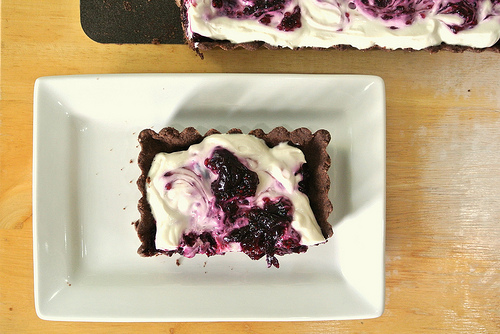
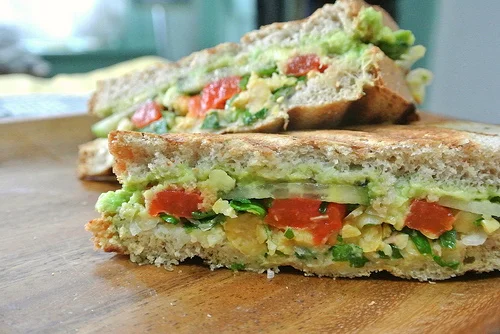
Like the jumbo buckwheat and blueberry pancake, this recipe halves perfectly. Make the whole thing for an express dinner, split it with a pal or make half if you're in the mood to pair it with a hearty salad or soup, or just make a half-recipe if all you need is a solid snack (or for a savory breakfast if you don't have a big appetite in the morning).

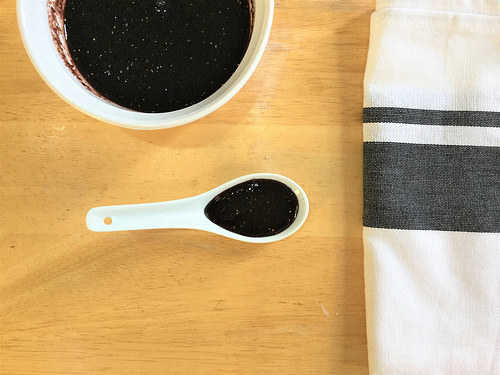
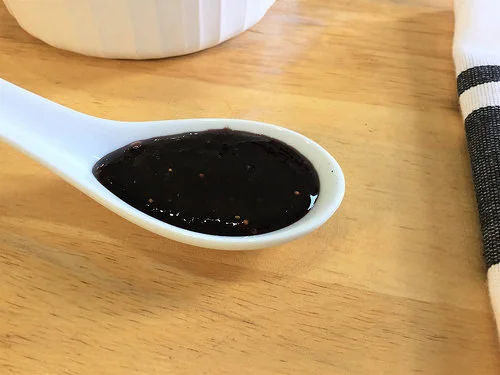
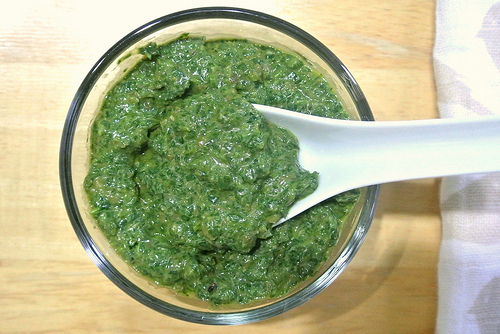
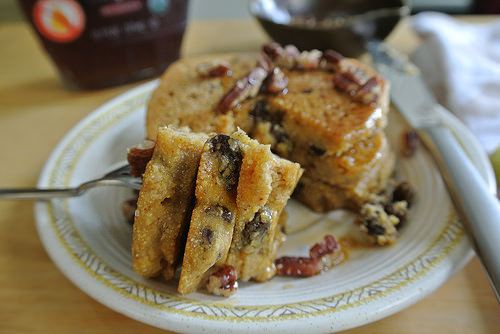
Finally, don't skip the sauce. You'll find this pancake just a touch dry, which is a feature, not a bug. It welcomes a generous amount of hot sauce, a mild pureed salsa, or whatever else you feel like drizzling on or dipping in without getting soggy.

Dead Simple Jumbo Savory Chickpea-Rice Pancake

Print the recipe

serves one generously, or two as a snack or meal component

1 tsp olive oil

1/4 cup chickpea flour

3 TBSP white rice flour

1 TBSP nutritional yeast

1/2 tsp vegetable broth powder [see Note]

1/4 tsp baking powder

1/2 cup water

small handful frozen (or fresh) peas

Heat oil in a large nonstick skillet over medium heat. Meanwhile, add chickpea flour, rice flour, nutritional yeast, broth powder, and baking powder to a bowl and whisk to combine.

When the skillet is hot, swirl the oil around the skillet to coat. Add water to dry ingredients, whisk to combine, and immediately add batter to skillet. Sprinkle the peas over the surface. Cook until the bottom is golden and the edges are visibly cooked at least 1/4-inch in (and up to 1/2-inch, being careful not to burn—this allows for easy flipping, even with the very large pancake), about 3-4 minutes. Flip with a wide plastic spatula and cook until cooked through and browned on the pea side, another 2-3 minutes.

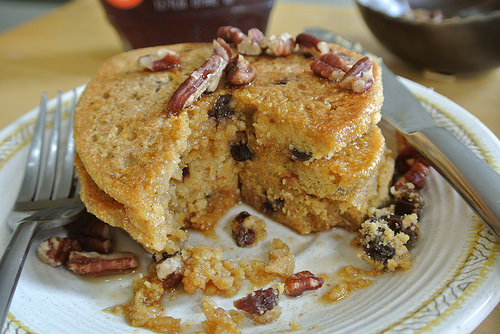
Serve at once with hot sauce, salsa, or other sauce of choice.

[Note: salt content will vary depending on the brand purchased. Season to taste after cooking, if needed.]

2 Comments

Comment

White Wine-Braised Chickpea, Tempeh, and Spinach Linguine from the Slow Cooker

Hey, welcome. Consider following MSV on Twitter and subscribing to the RSS feed, or sign up for email updates right over here.

Spring: some days are too hot for the oven, then you're hit with a blustery, rainy day that calls for a bowl of comfort. Either way, this recipe has you covered. Toss chickpeas, tempeh, spinach, artichoke hearts, and blissfully salty Kalamata olives into the slow cooker with a dose of herbs and white wine. Let it cook all day, and there's nothing left for you to do but boil the amount of pasta needed for the meal, and done. Repeat with leftovers, should you have them.

The whole thing depends on the garnishes to really shine, so don't skip them. A generous spoonful of chopped sun-dried tomatoes and a final squeeze of lemon over your plate are necessary ingredients to add color, intense bits of flavor, and brightness.

White Wine-Braised Chickpea, Tempeh, and Spinach Linguine from the Slow Cooker

Print the recipe

serves 4-6

For the legume-veggie mix:

8 oz frozen chopped spinach

1/4 cup chopped Kalamata olives

3 TBSP quick-cooking tapioca

1 no-salt-added vegetable bouillon cube

2 15-oz can chickpeas, drained, but not rinsed

8 oz tempeh

1 tsp dried basil

1 tsp dried oregano

1 tsp dried marjoram

1 cup dry white wine

6 oz canned (and drained) or frozen (and thawed) artichoke hearts, chopped

fine sea or kosher salt and freshly cracked black pepper

To serve:

1 lb linguine

generous 1/4-1/2 cup julienned oil-packed sun-dried tomatoes, drained well

lemon wedges, from 1-2 lemons

Layer spinach and olives into the crock of a slow cooker. Sprinkle tapioca evenly over the spinach. Place bouillon cube in the center of the crock. Pour drained chickpeas in evenly, then roughly crumble tempeh into the crock in small bite-size pieces. Sprinkle in each of the herbs, then slowly and evenly pour wine over the whole thing. Cover and cook on low seven to eight hours.

When ready to serve, stir in chopped artichoke hearts, add salt and pepper, to taste, and cover again. Cook pasta according to package directions. Divide pasta among plates and top with chickpea mixture. Add a generous tablespoon of sun-dried tomatoes to each plate and give a squeeze of lemon juice over the whole thing. Serve at once.

Comment

Comment

Dead Simple Red Wine-Fig Syrup

Hey, welcome. Consider following MSV on Twitter and subscribing to the RSS feed, or sign up for email updates right over here.

Three ingredients and occasionally stirring a pot are all that stands between you and this dreamy condiment. Red wine and figs make a rich and complex pairing that you can use to punch up any meal of the day.

Pancakes, ice cream, and pastries would all be happy to go for a swim in this syrup, but don't hesitate to work it into salad dressings or sandwiches, too. First one to try roasting Brussels sprouts in it, let us all know how it goes.

Crackers or toast spread with Kite Hill cream cheese (which provides a nice canvas to show off the syrup's color) absolutely beg for the stuff and make for an instant treat.

If you're feeling a little more ambitious, use the red wine-fig syrup to marble a batch of gently sweetened almond pate. This small tower was a recent take-along to a pal's housewarming (more on almond pate towers at a later date if all goes as planned). Good stuff.

Dead Simple Red Wine-Fig Syrup

Print the recipe

3 cups red wine, such as Zinfandel

1/2 cup fig jam

1/2 cup natural cane sugar (evaporated cane juice)

Bring all ingredients to a boil over high heat. Reduce heat to medium-low to maintain a low, steady simmer. Let cook down, stirring occasionally, for about an hour—give or take—until the mixture is reduced by two-thirds. Let cool completely before storing in the refrigerator in an airtight container. Syrup will continue to thicken a bit when chilled.

Comment

Comment

Dijon Chickpea and Broccoli-Stuffed Baked Potatoes with Creamy Dill-Caper Dressing

Hey, welcome. Consider following MSV on Twitter and subscribing to the RSS feed, or sign up for email updates right over here.

If there's one culinary benefit to winter, it's the freedom to crank the oven up and bake your veggies until browned and lovely. You're assured a plate with deep flavor with a minimum of effort. Make one of those veggies fluffy, earthy russet potatoes, and you've got a serious plate of comfort on your hands.

It goes like this: pop open a couple cans of chickpeas, tear up some broccoli, and toss that in a big pile of Dijon-style mustard (it'll seem like too much, but don't worry—it mellows out in the oven (thanks, Mollie Katzen)). The potatoes and the filling cook right alongside each other.

While all that takes care of itself in the oven, blend up a quick sauce that makes an ideal accompaniment for baked potatoes. It's cool and creamy thanks to a base of soy milk and tofu, and it's flavored with scallions, fresh dill, and capers. The dijon-roasted beans and veg also love this sauce. The three elements come together to make a totally satisfying meal.

Dijon Chickpea and Broccoli-Stuffed Baked Potatoes with Creamy Dill-Caper Dressing

Print the recipe

serves 4

For the potatoes, adaped from Food Network's Alton Brown:

4 medium-large russet potatoes, scrubbed

olive oil

fine sea or kosher salt

For the filling:

2 15-oz can chickpeas

3/4 lb broccoli crowns

1/3 cup Dijon-style mustard

1/4 cup olive oil

fine sea or kosher salt

For the dressing:

5 oz soft or firm tofu (one-third of a water-packed slab)

4 scallions, divided

1/2 cup unsweetened soy milk

2 TBSP lemon juice

1 TBSP packed fresh dill fronds

1 tsp drained capers

1/4 tsp fine sea or kosher salt

1/4 tsp freshly cracked black pepper

Heat oven to 350.

Poke three sets of holes on each side of each potato with a fork. Rub potatoes lightly with olive oil (your hands work great) and set directly on a rack placed in the middle of the oven (leave half the rack open for the chickpea dish). (Place a piece of aluminum foil on the rack below to catch drippings.) Sprinkle potatoes with salt. Bake one hour. Check for tenderness, and, if needed, bake an additional 15 minutes.

Meanwhile, drain and rinse chickpeas. Set aside in a sieve to let drain thoroughly. Break broccoli into small florets. Toss both with mustard, oil, and a generous pinch of salt. Add to oven and bake along with the potatoes, tossing once when the potatoes have been cooking for 30 minutes. The chickpeas and broccoli should be done when you test the potatoes at the one-hour mark.

Once the chickpeas and broccoli are in the oven, puree all sauce ingredients—using only the white and firm green parts of the spring onions—with an immersion blender in a wide-mouth mason jar. Cover with a clean kitchen towel and set aside to give the flavors time to mingle. Chop the scallion tops and set aside.

When the potatoes are done, carefully split them (press the ends to open them up for stuffing) and divide the filling among the potatoes. Serve at once. Allow each diner to add dressing to taste. Garnish with chopped scallion tops, as desired.

Comment

Comment

Baked Apples with Molasses & Spice Crumble

Hey, welcome. Consider following MSV on Twitter and subscribing to the RSS feed, or sign up for email updates right over here.

So that's a pretty ugly-looking dish up there, but you really want to make it, anyway. Because while not a visual show-stopper, the combination of tart and sweet apples, apricot jam, vanilla, molasses, cinnamon, nutmeg, and brown sugar all baked together create an aroma that will make your knees buckle. It's incredible. And dead-simple to throw together whenever you feel like something sweet.

And the flavor's not so bad, either. The molasses obviously makes a stickier topping than you'd get from a classic crisp topping, but it also compacts the volume and concentrates the flavor. Pair that with a deep dish of tender apples with a little bite left in them, and you have the easiest path to a seriously satisfying little dessert. Transform leftovers into breakfast by tempering the sugar with a dollop of plain nondairy yogurt.

Baked Apples with Molasses & Spice Crumble

Print the recipe

serves 6

1 large (10-12 oz) sweet apple, such as Honeycrisp

1 small-medium (8-10 oz) tart apple, such as Granny Smith

1/2 cup apricot jam (look for a brand that lists apricots as the first ingredient)

1/2 tsp vanilla extract

fine sea or kosher salt

1/2 cup rolled oats

1/2 cup almond flour (or all-purpose flour)

1/2 tsp ground cinnamon

1/4 tsp freshly grated nutmeg

2 TBSP turbinado (or brown sugar)

2 TBSP canola oil

2 TBSP blackstrap molasses

Heat oven to 350.

Core apples and slice thinly into 1/8-inch-thick slices. Add to a mixing bowl with jam, vanilla, and a pinch of salt. Stir until well combined and transfer to a deep 8-inch round dish (an 8x8 square pan should also work).

To the same mixing bowl, add oats, almond meal, cinnamon, and nutmeg. Toss to combine. Add turbinado, oil, and molasses. Stir with a fork until uniformly moistened. Dollop topping over apples, spread out to cover evenly with wet hands or the wet back of a spoon. Bake 25-30 minutes, until apples are tender (but not too soft) and topping is browned and very fragrant.

Let cool 10 minutes before serving.

Note: while hot, the jam and apple juices will remain syrupy but will firm up into a loose jammy consistency as the dish cools.

Comment

Comment

Dead Simple Polenta and Herb Gratin

Hey, welcome. Consider following MSV on Twitter and subscribing to the RSS feed, or sign up for email updates right over here.

Creamy, comforting, a little rich but not greasy, seriously fragrant, and seriously easy to throw together, this wildly handy and tasty polenta gratin is likely to be on heavy rotation all fall and winter long. It gives big return for simply slicing, whisking, pouring, and baking.

The trick here is taking advantage of prepared polenta. You'll dress it up with dried herbs (making this a fabulous pantry recipe), soy milk, and almond meal. Admittedly, making your own polenta in advance will probably make this taste even better, but this recipe about convenience. The effect is obviously different from a traditional potato gratin, but you still get lots of creamy, carb-y goodness with a fraction of the work.

This will effortlessly round out any simple meal, like a green salad with some beans or tofu for protein. Or serve it with scrambled tofu and baked apples for brunch. And it will be right at home on any big fall holiday table, if you happen to have one of those coming up.

Dead Simple Polenta and Herb Gratin

Print the recipe

serves 4-6

18 oz polenta (1 prepared tube)

3/4 cup unsweetened soy milk

1/4 cup blanched almond meal

1 TBSP nutritional yeast

rounded 1/4 tsp fine sea or kosher salt (plus additional for finishing)

1/4 tsp garlic powder

1/4 tsp dried thyme

1/4 tsp dried oregano

1/4 tsp dried rosemary

pinch crushed red pepper

freshly cracked black pepper

Heat oven to 375.

Slice polenta into thin (scant 1/4-inch) slices and arrange in an overlapping spiral pattern in a 1 1/2-quart baking dish (shallow, app 9"x12"). Whisk together measured salt, garlic powder, thyme, oregano, rosemary, and red pepper. Pour slowly and evenly over polenta. Sprinkle top with a pinch of additional salt and add freshly cracked black pepper, to taste. Bake until polenta is lightly crusted and bubbly, 35-40 minutes.

If desired, finish under broiler to give the top a golden brown finish in spots. Let cool 5-10 minutes before serving.

Comment

Comment

Dead Simple Warming Sweet Potato and Black Bean Soup

Hey, welcome. Consider following MSV on Twitter and subscribing to the RSS feed, or sign up for email updates right over here.

This brightly colored bowl really puts the potato back in sweet potato. Leaving the skin on the sweet potatoes here emphasizes their earthy quality over their sweetness, and spiking the pot with two chile powders adds a lovely warmth in the back. Nutritional yeast, a touch of garlic, and a bouillon cube add extra savory notes. To bump up the protein, plus add texture and visual interest, toss in a can of black beans at the end. (And to bump up the protein even more, you'll puree in a can of chickpeas.)

In the end, you have a simple, comforting, portable (tip: store leftover soup in mason jars), everyday meal that contains a bunch of stuff that's good for you (and a ton of it, too). And the only thing you have to chop is a couple of sweet potatoes. How's that for everyday eats?

But if you want to take an extra minute to whip up a little coconut bacon to sprinkle on top while the soup cooks, no one would question you.

Dead Simple Warming Sweet Potato and Black Bean Soup

Print the recipe

serves 10-12

8 cups water

24-26 oz sweet potato (2 large), cubed

1 15-oz can chickpeas (or white beans), drained

1/4 cup nutritional yeast

1 clove garlic

1 Not-Chick'n bouillon cube

1 tsp ancho powder, or other mild chile powder

1/2 tsp cayenne powder

1/2 tsp dried oregano

1/2 tsp fine sea or kosher salt

1 15-oz can black beans

Add all ingredients, except black beans, to a soup pot over high heat. Cover and bring to a boil. Reduce heat to maintain a strong simmer and let cook, covered, 25-30 minutes, or until potatoes are tender.

Meanwhile, drain and rinse black beans in sieve. Set aside to let drain well.

When the potatoes are tender, remove pot from heat. Carefully puree the soup with an immersion blender until very smooth. Return pot to heat, add black beans, and heat until beans are warmed through. Adjust salt, if needed.

Comment

Comment

Dead Simple Lemon-Pepper Tofu Spread

Hey, welcome. Consider following MSV on Twitter and subscribing to the RSS feed, or sign up for email updates right over here.

Tofu on bread makes up a lot of easy dinners in the MSV house. This particular spread is a favorite for a couple of reasons, though. First, lemon and freshly cracked black pepper are a lovable combination that never gets old.

Second, there's pretty much always tofu and lemon hanging out in the kitchen, which means this mellow and simple spread can be on your plate pretty much any time you decide you feel like blending up a batch. And then you have leftovers.

This spread eats just fine on toast all alone (or crackers, if you need even more convenience), but the cool creaminess of the tofu, brightness of the lemon, and heat of the pepper are even better topped with, say, a little greens quickly sauteed with smoked paprika or smoked salt. With multigrain toast, that's a lot of satisfying flavor piled deep into a blissfully unfussy meal.

Dead Simple Lemon-Pepper Tofu Spread

Print the recipe

yields about one pound

1/2 cup pepitas, roasted and lightly salted

14-16 ounces firm tofu, drained

1/2 tsp fine sea or kosher salt

2 TBSP lemon juice

zest of 1 lemon

1 tsp freshly cracked black pepper

Process pepitas in a food processor to fine crumbs. Add tofu, salt, and lemon juice, and blend until very smooth, pausing to scrape the sides as needed. Stir in lemon zest and black pepper. Adjust salt, if needed (particularly if you use unsalted pepitas). Flavor is best after chilling for an hour or so, but can be used immediately.

Comment

Comment

Cherry Tart with a Dead Simple Salted Chocolate Crust

Hey, welcome. Consider following MSV on Twitter and subscribing to the RSS feed, or sign up for email updates right over here.

This guy is gonna sell itself. Grab your dark cherries, season them a little on the stove, then pile them into an entirely lovable chocolate crust—with little hits of salt strewn throughout—that just happens to be the very definition of forgivable.

And because glossy fruit begs to be paired with creamy things, take a minute to whip up a combination of nondairy cream cheese and silken tofu for a dreamy effect that's stiffer than whipped cream, but fluffier than cream cheese. It's a really handy combination, and you can likely expect to see it here again in other applications.

Top the whole thing with fruit, swirl it around for a nice presentation, and you'll be one happy summer camper. And because you need to make this tart in advance, anyway, it's a seriously easy way to entertain.

Cherry Tart with a Dead Simple Salted Chocolate Crust

Print the recipe

serves 6-8

For the crust:

3/4 cup all-purpose flour (to measure, spoon in and level off)

1/4 cup cocoa powder, such as Equal Exchange brand

1/3 cup natural cane sugar (evaporated cane juice)

1/2 tsp fine sea or kosher salt

1/4 cup refined coconut oil

For the cherry filling:

1 lb pitted dark cherries, frozen or fresh

2 TBSP natural cane sugar (evaporated cane juice)

juice of half a lemon

2 TBSP quick-cooking tapioca

1/2 tsp vanilla extract

For the creamy filling:

6 oz firm silken tofu (half of an aseptic pack)

4 oz nondairy cream cheese, such as Tofutti brand

2 tsp natural cane sugar (evaporated cane juice)

1 tsp vanilla extract

1/2 tsp lemon zest

Heat oven to 375.

Begin with the crust. Whisk together flour, cocoa powder, sugar, and salt. Add coconut oil and mix until sandy and uniform. Press into a 14x4-inch nonstick rectangular tart pan. Bake 8-10 minutes. The crust will go from done to burned with speed, so watch—and smell—carefully. Transfer pan to a wire rack to let cool.

Prepare the cherry filling. Combine cherries, sugar, and lemon juice in a small pot over medium heat. Bring to a boil and let cook until cherries have released their liquid and begin to break down, about 10 minutes. Reduce heat slightly (to avoid splashing) and add tapioca. Cook, stirring frequently, five minutes. Remove from heat, stir in vanilla, and set aside to let cool a bit.

Finally, prepare the creamy filling. Puree all ingredients until very smooth.

When the crust has cooled, add all but one-half cup of cherry filling. Dollop and smooth creamy filling over the top. Dollop reserved half-cup of cherry mixture over that, and swirl with a chopstick by making infinity marks up and down the length of the tart. Chill at least a couple of hours before removing tart pan side piece and serving. During this time, the cherry filling will become more sliceable and the flavor of the creamy filling will come together. Fillings will continue to firm up over the next six to eight hours.

Tart will keep in the fridge, covered, for a few days.

Comment

2 Comments

Party Animals No. 45: Lemony Potato (or Bean) Salad

Hey, welcome. Consider following MSV on Twitter and subscribing to the RSS feed, or sign up for email updates right over here.

First, let's attack the obvious: this post is about potato salad, but eagle-eyes out there may have noticed that isn't potato salad up there, but rather chickpea salad. Despite not being made with potatoes, it's good stuff.

This potato salad came along to a backyard hangout a couple weeks back, and there was no plan to mention it on MSV. Not that the recipe isn't nice, but it's pretty straightforward: potatoes, celery, capers, lemon zest, and whatever herb you have lying around (the original recipe calls for basil, but it was parsley for the potato version for the party, dill with the chickpeas shown here). It's a long-time favorite in the MSV house and goes with pretty much anything, which makes it a great side to bring when you're planning on playing a quiet supporting role at a pal's gathering. But on the way out the door, the compliments started piling up. The host asked what was in the dressing. The answer is olive oil and lemon juice, plus a little dijon and sugar. That's it.

It's a good lesson for vegan cooking and entertaining. It's easy (and sometimes fun!) to sweat substitutes, but never forget that a little extra olive oil and lemon go a long way.

Naturally, the next step was to put together a protein-packed version. Relying on the convenience of canned beans, there's not a bit of heat to apply, and this recipe couldn't be easier. Or handier to keep in the fridge. Munch on it as-is, or tuck it into wraps or pitas with summer veg and sprouts. Leave the chickpeas whole or mash them up to make them easier to turn into sandwich filling. Try it with different beans, lentils, or tempeh.

So get the recipe. For the party, the recipe was doubled, using about four pounds of potatoes. For the chickpea version, make the recipe as directed using two cans of beans rinsed and well drained. You may not need all the dressing for a bean version, since beans aren't as starchy and absorbent as potatoes (but you may want to use it all, especially if you're making it as a sandwich filling—follow your bliss), but you won't be sad to have a little extra dressing in the fridge for whatever. You'll also need less salt for beans. Otherwise, you don't need any help getting this dead-simple side onto your plate.

Back next week with a new recipe.

2 Comments

Comment

Dead Simple Chipotle Black Bean-Tempeh Tacos with Fresh Strawberry Salsa

Hey, welcome. Consider following MSV on Twitter and subscribing to the RSS feed, or sign up for email updates right over here.

These half comforting and spicy, half crisp and fresh tacos are a great solution for any old day when you don't want to spend too much effort on cooking, but still feel like taking a minute to run your knife through something fresh and fragrant (hi, cilantro).

The title pretty much lays it all out here. You got your handy can of earthy black beans, your block of nutty tempeh, and you'll throw those into a pan with a good dose of chipotles en adobo—for maximum flavor with maximum convenience—and some garlic cloves. Load that into warm, soft corn tortillas and finish them off with what is essentially a pico de gallo with the tomatoes replaced with spring strawberries and the jalapeno omitted, since you already have plenty of that in your base. Dinner is served.

Dead Simple Chipotle Black Bean-Tempeh Tacos with Fresh Strawberry Salsa

Print the recipe

yields 6-8 tacos

1/4 cup finely diced white onion (from about half of one small onion)

juice of 1 lime

2 TBSP olive oil

8 oz tempeh

1 15-oz can black beans

2 chipotles en adobo, plus 1 additional TBSP adobo sauce

3 cloves garlic, crushed

8 oz fresh strawberries

1/4 cup loosely packed cilantro

fine sea or kosher salt

to serve, 6-8 warm corn tortillas

In a bowl large enough to hold the fresh salsa, combine diced onion and lime juice. Set aside to let the onion mellow while you prepare the filling.

Drain and rinse black beans in a sieve. Set aside to let drain thoroughly.

Heat olive oil in a skillet over medium heat. When the oil is just warm enough to sizzle mildly when a piece of tempeh is added to it (not too hot), carefully crumble the tempeh finely with your hands into the pan. Let cook about five minutes, tossing only every couple of minutes to let the tempeh brown. Meanwhile, seed and finely chop chipotles en adobo.

Add crushed garlic cloves and chipotles to the pan. Cook another two-three minutes, tossing only every minute, until the garlic begins to turn golden. Add adobo sauce and drained beans. Let cook until hot, stirring frequently—this should only take a couple of minutes. Set aside and keep warm.

While you warm the tortillas, trim strawberries and chop into half-inch chunks. Chop cilantro. Add both to the onions and lime along with a generous pinch of salt. Stir well.

To assemble, discard garlic cloves before dividing black beans and tempeh among tortillas, then top with strawberry salsa. Serve immediately.

Comment

Comment

Arugula Relish (with Capers, Dijon, and Balsamic Vinegar)

Hey, welcome. Consider following MSV on Twitter and subscribing to the RSS feed, or sign up for email updates right over here.

Next time you're looking for a way to put your extra pile of peppery arugula to work, make this condiment. It adds a shot of spice and chlorophyll to any dish along with a little depth and plenty of salt thanks to lots of capers and a little Dijon mustard and balsamic vinegar.

Spread a thin layer on toast, toss a bit with cooked veg, or, naturally, hit a simple seared tofu sandwich with a good helping. Having this in your fridge makes for great, fast savory breakfasts that provide serious satiety.

Arugula Relish (with Capers, Dijon Mustard, and Balsamic Vinegar)

Print the recipe

yields about 3/4 cup

1/4 cup extra virgin olive oil

1 small clove garlic, crushed

1/4 tsp freshly cracked black pepper

2 tsp Dijon-style mustard

2 tsp balsamic vinegar

2 packed cups arugula leaves

2 TBSP drained capers

Add oil, crushed garlic, black pepper, mustard, and vinegar to a bowl. Whisk until emulsified. Set aside and let the garlic steep five (or so) minutes while you prepare the arugula.

Add arugula leaves to a food processor and pulse until broken into small pieces. Add capers and pulse to incorporate. Discard garlic clove from dressing. Add dressing to processor and process until well combined. Refrigerate until ready to use.

Comment

Comment

Dead Simple Five-Layer Chickpea Salad Sandwich

Hey, welcome. Consider following MSV on Twitter and subscribing to the RSS feed, or sign up for email updates right over here.

dead simple five-layer chickpea salad sandwich ingredients.jpg

Today, we lunch. This fuss-free sandwich combines the convenience of pantry items with a generous heap of fresh ingredients to make one breezy little dreamboat of a meal. It all starts with chickpeas mashed with a simple mix of parsley, lemon, and olive oil. (If you're in an even bigger hurry, grab a can of white beans instead, which will mash readily with a fork—you'll lose a touch of texture, but whatever works.)

Next, add avocado for creamy texture and richness that balances all the lighter elements you're piling on. Finish the whole thing with convenient jarred roasted red pepper, a few slices of crispy cucumber, and a shot of grassy, fragrant chives. Season, sandwich, grill, and devour.

Grilling isn't strictly necessary, but the pressure really boosts cohesion, and the toasted bread adds welcome texture. Speaking of bread and texture, be sure to choose a nice, thick, hearty loaf that will stand up to your filling (and grilling). This guy will also make a great picnic sandwich served on baguette—see the note in the recipe below.

Dead Simple Five-Layer Chickpea Salad Sandwich

Print the recipe

yields 4 sandwiches

For the filling:

1 cup drained canned chickpeas

1 large (or 2 small) roasted red bell pepper (drained if using jarred)

1/4 oz chives

1 small-medium cucumber

flesh of 1 ripe avocado

juice of 1/2 lemon, divided

fine sea or kosher salt

1/4 cup fresh parsley, large stems discarded

1 TBSP olive oil

To assemble:

8 slices hearty bread

fine sea or kosher salt

freshly cracked black pepper

dried oregano

Rinse the chickpeas in a sieve and set aside to let drain thoroughly.

Meanwhile, cut pepper into 1/2-inch-thick strips and set aside. Finely chop chives and set aside. Thinly slice cucumber and set aside.

Use a fork to mash avocado with 1 tsp lemon juice and a generous pinch salt. Set aside.

Chop parsley leaves so that no large leaves remain. Use a potato masher to mash chickpeas, parsley, olive oil, generous pinch salt, and 1 TBSP lemon juice until chickpeas are broken up.

Heat a closing countertop electric grill. To assemble one sandwich, take two slices bread. Add one-quarter of the chickpea salad to one slice and one-quarter of mashed avocado to the other slice. Atop the chickpeas, add pepper slices, chives, and cucumber slices. Sprinkle a generous pinch each salt, pepper, and dried oregano over the mashed avocado. Sandwich, grill until browned (about three minutes), and serve immediately. Repeat with remaining ingredients.

Picnic Variation: Assemble sandwiches using baguette. Do not grill. Wrap each snugly in parchment paper. Stored this way, sandwiches will keep well for 2-3 hours.

Comment

Comment

Roasted Tempeh, Green Bean, and Orange Salad with Tahini Dressing

Hey, welcome. Consider following MSV on Twitter and subscribing to the RSS feed, or sign up for email updates right over here.

This is how you make a winner of a dinner salad on any given weeknight: bake a block of tempeh in a maple-tamari-Dijon glaze, toss in tender, convenient frozen green beans, and infuse the whole thing with fragrant orange slices. Toss some salad greens in a dead-simple tahini dressing, and you have a meal-sized green salad fit for bitterly cold winter days. While you're at it, feel free to make a double-batch of dressing to keep on hand for the rest of the week. It seriously comes in handy.

This salad is a particularly good argument for trying tempeh (or other unfamiliar foods) in context. Tempeh is famously earthy, deeply nutty, and apparently not for everyone. You can smother it in sauce to play down its distinct flavors (Frank's Red Hot, anyone?), but don't forget to try finding satisfaction in balancing those earthy characteristics with a gentler touch. You'll find the glazed tempeh here still tastes like tempeh, but the maple and other seasonings begin to smooth out the edges. A forkful of roasted veg and dressed greens—all gently scented with sweet orange—pair beautifully with the finished product.

Keep in mind that while baking the garnishes takes a bit of time, there's very little effort that goes into this lovely dish. You'll take your knife to a block of tempeh and an orange, but if you use frozen green beans and pre-washed salad mix, that's as tough as it gets. While the tempeh roasts, you'll whisk together the dressing and quickly toast some sesame seeds with plenty of time left to clean up. Then there's little left to do but open a bottle of wine, put your feet up, and wait for the timer to chime. Dress your greens, and dig in.

Roasted Tempeh, Green Bean, and Orange Salad with Tahini Dressing

Print the recipe

serves 2

1 medium-large orange, cut into 1/2-inch-thick half moons (discard ends)

2 handfuls frozen thin green beans

1 TBSP olive oil

pinch salt

a crack or two of black pepper, to taste

8 oz tempeh, cut into 1-inch dice

1 TBSP maple syrup (grade B preferred)

2 tsp reduced-sodium tamari

2 tsp Dijon-style mustard

1 TBSP sesame seeds

2 TBSP tahini

2 TBSP extra virgin olive oil

1 TBSP lemon juice

1 TBSP water

1/4 tsp fine sea or kosher salt

1/8 tsp garlic powder

5 oz spring mix or tender lettuce

Heat oven to 400. Line a roasting dish with parchment.

Add orange, green beans, 1 TBSP oil, salt, and pepper to a mixing bowl. Toss to coat and transfer to prepared dish, leaving one-third of the space open for the tempeh.

Whisk together maple, tamari, and mustard. Add tempeh to the mixing bowl with half of the glaze. Toss to coat thoroughly and transfer to prepared dish. Roast 20 minutes.

Meanwhile, dry toast sesame seeds in a skillet over medium heat for a few minutes, tossing frequently, until fragrant. Transfer to a plate to let cool.

In a bowl, whisk together tahini, 2 TBSP oil, lemon juice, water, salt, and garlic powder. Set aside. Add salad greens to a clean mixing bowl.

After the first 20 minutes, give the green beans and oranges a gentle toss, then toss the tempeh. Drizzle remaining glaze over tempeh and bake another 20 minutes.

When tempeh is done, toss salad greens with the dressing and divide between two serving dishes. Top each dish with half the tempeh and green bean-orange mix. Top each with half the toasted sesame seeds and serve.

Comment

Comment

Spicy & Smoky Two-Bean Dip

Hey, welcome. Consider following MSV on Twitter and subscribing to the RSS feed, or sign up for email updates right over here.

Say, do you like beans? Well, are you ever in the right place.

That may not look like much, but you're approaching the height of comfort food with this dish right here. And it's dead simple. Simmering canned pinto beans with chipotles en adobo and a bay leaf gets you a pretty great dip by itself. (The heat here isn't intense, but if you're sensitive to it, reduce the chipotles or try substituting them altogether with some liquid smoke.)

But there's no reason to stop there.

While the pintos are simmering, you might as well combine a can of black beans with a couple different spices and let them get soft and saucy. Put them together and you've got a bowl of joy. Serve it all with a salad spiked with citrus—green or otherwise—or use that salad as a taco topper (swap cilantro in for the mint) and tuck this creamy dream of beans into warm tortillas. Did it just get hungry in here?

Spicy & Smoky Two-Bean Dip

Print the recipe

2 15-oz can pinto beans, drained and rinsed

3 small-medium chipotles en adobo (seeded, if desired)

1 dried bay leaf

1 cup vegetable broth (not tomato-based), divided

1 15-oz can black beans, drained and rinsed

1/2 tsp ground cumin

1/2 tsp ground coriander

1/2 tsp smoked paprika

salt, to taste

Add pinto beans, chipotles, and bay leaf to a medium pot with 3/4 cup of the broth. Stir to combine. In a small pot, combine black beans, cumin, coriander, paprika, and 1/4 cup broth.

Bring both pots to a boil. Reduce heat to maintain a steady simmer. For the pintos, cover and simmer over low heat. For the black beans, simmer uncovered on medium-low (or slightly lower, as needed) heat. Stir both pots occasionally and let cook 10 minutes.

After 10 minutes, the black beans should be hot and still a little saucy. Adjust salt, if needed. Turn the heat off and cover to keep warm. At this point, uncover the pinto beans and let simmer an additional five minutes.

Remove pinto beans from heat and mash thoroughly with a potato masher. The beans should not be soupy, but there may be what seems like some extra liquid remaining, which is good. The beans will thicken shortly. Adjust salt, if needed.

Transfer mashed pinto beans to a serving bowl. Top with black beans and serve at once.

Comment

Comment

Penne in Dead Simple Eggplant Sauce with Smoked Almonds and Sun-Dried Tomatoes

Hey, welcome. Consider following MSV on Twitter and subscribing to the RSS feed, or sign up for email updates right over here.

You get a lot of lovable stuff on this plate: chewy pasta, silky eggplant, smoked almonds, and sun-dried tomatoes. They sell themselves.

Eggplant is notoriously difficult to cook to pleasing texture. It can turn mushy, which becomes an advantage if you're making pasta sauce. Cooked with white wine and garlic, it's a great autumnal alternative to tomato sauce.

Now for the ease with which you can get all that lovable stuff onto your plate. Come home, pour yourself a glass of wine (or don't), chop an eggplant, chop some garlic, run your knife through the tomatoes and almonds. Put the sauce ingredients in a pan (don't even bother sauteing), cover, and walk away while it simmers. Put your feet up. Read a magazine story (or don't). Sweat absolutely nothing. Boil some pasta, and dinner is served.

Penne in Dead Simple Eggplant Sauce with Smoked Almonds and Sun-Dried Tomatoes

Print the recipe

serves about 6

1/4 cup olive oil

1 medium globe eggplant, 1 1/4 lbs total weight, peeled, trimmed, and cut into 1-inch cubes

6 cloves garlic, minced

1 TBSP nutritional yeast

1 tsp dried oregano

1/2 tsp fine sea or kosher salt

1 cup dry white wine

scant 1/4 cup julienned sun-dried tomatoes, roughly chopped

1/4 cup plus 2 TBSP salted smoked almonds, chopped

1 lb whole wheat penne, or other pasta

Add the oil, cubed eggplant, garlic, oregano, salt, and nutritional yeast to a large skillet. Pour wine over skillet contents. Cover, bring wine to a boil, and reduce heat to low to maintain a steady simmer. Cook, covered, 30 minutes. Use a potato masher to create a pulpy sauce. Stir in sun-dried tomatoes, cover again, and keep warm.

Cook pasta according to package directions (10-11 minutes for al dente whole wheat penne). Drain well. Add to a large serving bowl. Pour the sauce in, toss well, and top with chopped smoked almonds. Serve at once.

Comment

Comment

Hash Brown Bake for MSV's Third Anniversary

Hey, welcome. Consider following MSV on Twitter and subscribing to the RSS feed, or sign up for email updates right over here.

Let's begin with a confession: I created this recipe for Thanksgiving. I know that's a holiday nearly two months away, and this post is for MSV's third anniversary, but bear with me. I also know that Thanksgiving is about as insensitive and manufactured a holiday as you could dream up, but my family celebrates it. I think most holidays here get uncomfortable. Folks in the U.S. fire up the grill and crack open the brews on Memorial Day. We hit big sales at big box stores on Labor Day. National holidays are meant to recognize dramatic parts of our history, yet it's perfectly human to want to gather with friends and family when those of us lucky enough to get it find free time.

I don't think the dominant U.S. culture is particularly good at gathering with people to remember and recognize. We're trained to be optimists and told we're masters of our destinies. When someone tells us their troubles, we're prone to insist the silver lining is bigger than the cloud. Instead of recognizing, we "celebrate," with decidedly upbeat connotation. Jovially celebrating dramatic parts of our history gets inappropriate pretty fast.

To be honest, I do love Thanksgiving as a celebration of fall harvest and as a way to ease the long nights. It helps that it's a food-centric holiday, and my hobby is cooking, and I get to prepare the big meal for my small family. Most of the time, I cook for myself. In a way, I cook for you guys here on MSV. But people need people, and actually serving food to people means something to me.

I took over Thanksgiving hosting duties in my late twenties because one year neither my mother nor my boyfriend's mother, the traditional preparers, wanted to cook. I thought skipping it sounded like a bummer, so I offered to host. I've done it for years now, but I went vegan a few years in, and I'm firm about not cooking animal products in my home. The lack of tradition allows me to tweak the menu annually for variety, and also to figure out what plant dishes everyone likes best. That means by Halloween, I'm fretting about a centerpiece for late November.

My hosting dinner started out with really low stakes. I was just trying to make sure we didn't miss out on a day most of the people we knew were digging into full tables. But I'm testing early this year because this Thanksgiving feels like a bigger deal than it has been in the past.

My boyfriend's mother, Shirley, died in early September after many tough years of living with pulmonary disease. I knew her as a selfless woman who always made me feel welcome in her home (no small task when dealing with someone as lousy at conversation as I am). Even though we weren't legally family, I never doubted that she considered me part of hers. She accepted both me and my relationship with her son and genuinely appreciated them as they are, even if the shape of those might not have been easy for her to understand. She went to her grave without knowing what practicing veganism means, though I'd been doing it for nearly four years at the time of her death. And that my boyfriend and I aren't married after the better part of a decade together is probably a fact that seemed strange (possibly even wrong) to her, but one that she never asked me to answer for.

Shirley kind of hated Thanksgiving, at least in the time I knew her. Occasionally, I feel badly that I probably forced her to keep celebrating it. We might have let the whole thing drop, and I suspect that would've been all right with her. A decidedly fussy eater in general, she once announced over a holiday meal she had prepared that she hated holiday food. But her family loves it.

I didn't host Thanksgiving last year. Shirley struggled once a year with weak lungs to climb the two flights of stairs that lead to our apartment, and she'd understandably had enough of it. She instead searched out one of the buffets in town where we all went together, and I made a spread for my boyfriend and me the next day. Now, given that fall is here, one of the ways my boyfriend and his father have talked about looking ahead and spending time together in the wake of Shirley's death is planning to gather once again at our home for the Thanksgiving meal.

One of the dishes Shirley made for special occasions was a potato casserole, heady with saturated fat, topped with breakfast cereal flakes, and greeted eagerly by everyone in the family (except me, with the incomprehensible diet). I'm not going to try to make it. She liked that casserole. It was one of the few things she did eat off a holiday table(*). It would seem misguided, even ghoulish, to me to try to recreate her casserole. I'm setting this table for people I care about who are in pain. It's important to me to recognize that in whatever small way I can. But I can't quiet the urge to commemorate her when it comes time for me to host my family, and I tend to respond to life with food.

So instead I've worked out a potato dish of my own that I hope will serve a similar function to Shirley's casserole. This one keeps it simple and adds creamy fat through foods I'm comfortable working with, almond meal and soy milk. And as a replacement for the beloved thinly sliced herbed potatoes from Veganomicon I used to make for Thanksgiving, it's much quicker to throw together, a definite bonus when you're putting together a large spread. It also takes one convenient cue from Shirley's casserole by using pre-cut frozen potatoes. Though nontraditional, it's nevertheless a rich and comforting dish. It can't do a thing about the death of a family member. But it's what I need to cook right now.

This is MSV's third anniversary, and I'm grateful you guys are all here for it. In the weeks leading up to this, I persisted in testing a cake to post for today, but I finally had to admit it felt forced. A classic marker of festivity doesn't fit here right now. This fall for my family isn't really about celebration. It's more about recognizing and remembering. We have things to regret and things to be happy for. This year, fewer of us will do just that around a full table.


(*Another was biscuits, which I always made sure to include for her. Note I'm updating that recipe this year to substitute vegetable shortening for half the nondairy butter, which makes a dramatically more tender biscuit. I always used it as an omnivore, but eventually skipped buying it. I recently splurged on the shortening for a gift batch and was shocked at the difference. Sorry I fell down on those biscuits in the last few years, Shirley. You deserved better.)

Creamy Hash Brown Bake

Print the recipe

serves 6-8

1 cup unsweetened soy milk

1 cup blanched almond meal

1 clove garlic

1 TBSP nutritional yeast

1 TBSP lemon juice

3/4 tsp fine sea or kosher salt, divided

1 lb frozen hash browns (look for a brand that contains nothing but potatoes)

3 TBSP panko crumbs

Heat oven to 375.

In a quart jar with an immersion blender, blend milk, almond meal, garlic, nutritional yeast, lemon juice, and 1/2 tsp salt.

In a shallow medium baking dish, spread hash browns evenly. Slowly and evenly pour milk blend over potatoes.

In a small bowl, whisk together remaining 1/4 tsp salt and panko crumbs. Sprinkle evenly over potatoes.

Bake 40 minutes, until creamy throughout and browning at the edges. Switch to the broiler for a few minutes to brown the top. Serve hot.

Comment

Comment

Dead Simple Za'atar-Spiced Tempeh Flatbreads

Hey, welcome. Consider following MSV on Twitter and subscribing to the RSS feed, or sign up for email updates right over here.

So homemade soy yogurt has been happening around here. It's good stuff, and it works a humble kind of magic in this simple, generous wrap, where it's mixed with prepared hummus (like from these folks at area grocers or from your favorite corner falafel joint) to add creamy texture and mellow that potent dish out a bit. Next, slice up some tempeh, toss it with za'atar, and throw it on the countertop grill (or stovetop griddle).

Chop a little cucumber, cherry tomatoes, and parsley for one last gasp of summer produce. Finish it with a good dose of lemon, and say hello to a seriously satisfying wrap, easy enough for lunch and substantial enough for a dead-simple dinner.

And don't skip wrapping your flatbread with parchment or foil. It ensures all your filling stays in the flatbread, where you want it, instead of on your plate. Unwrap it little by little as you eat.

Dead Simple Za'atar-Spiced Tempeh Flatbreads

Print the recipe

serves 4

12 oz tempeh (1 1/2 8-oz packages)

1 1/2 TBSP olive oil

1 1/2 TBSP za'atar

1/2 cup hummus (preferably one not shy with the garlic)

1/4 cup plain (or unsweetened) nondairy yogurt

16 cherry tomatoes

1 small cucumber

small handful parsley

4 7-inch flatbreads (or pita loaves)

1 lemon, cut into four wedges

Heat a countertop electric grill (or a griddle on the stove).

Lay the block of tempeh in landscape position (with the long end toward you), and cut it in half. Cut each half in half. Cut each quarter into four equal slices. Repeat with other half-block of tempeh. You will have 24 slices.

Add oil and za'atar to a mixing bowl. Add tempeh slices and gently toss with hands until evenly coated (some will break—don't sweat it). Arrange tightly on the countertop grill in one layer and close the lid. Cook until golden, about 10 minutes. (If using a griddle, flip halfway through cooking.)

Meanwhile, cut cherry tomatoes in half. Chop cucumber into small dice. Roughly chop parsley.

When the tempeh is done, transfer to a plate and carefully wipe off grill. Cook each flatbread on the grill a few minutes each, until softened and showing some grill marks.

To assemble, place a piece of foil or parchment halfway down your plate. Place a flatbread on top. Spread three tablespoons of the hummus-yogurt mixture vertically along the center, leaving one inch at the top and bottom. Add six slices tempeh, eight tomato halves, a quarter of the cucumber (about two tablespoons), and parsley. Give a generous squeeze of lemon, fold the sides over, and fold the parchment or foil over that, twisting at the bottom to seal. Serve warm.

Comment

Comment

Lemon-Thyme Potato and Chickpea Hash

Hey, welcome. Consider following MSV on Twitter and subscribing to the RSS feed, or sign up for email updates right over here.

Cooking a satisfying meal isn't always as simple as throwing a bunch of lovable things into one skillet, but today we get lucky. Both well balanced and deeply comforting, this mix of hearty chickpeas and tender potatoes offers high reward with low effort all in one skillet.

Brown the potatoes with salt and thyme, stir in the chickpeas, then top the whole thing with garlic and lemon. The heat does the rest of the work, and you have time to whip up a pretty green side dish to round out the plate. Shown above is a side of seared green beans topped with cubes of salty, smoky eggplant, all given a squeeze of lemon. It made for a great plate.

Red potatoes are recommended for texture and contrasting color next to the chickpeas, but feel free to use a gold or fingerling variety, if that's what you have around. Either way, don't reduce the oil called for in the recipe. Even if you use a nonstick skillet, the oil in the recipe is needed to keep the hash from becoming dry.

Lemon-Thyme Potato and Chickpea Hash

Print the recipe

serves 2 generously

1 TBSP plus 1 tsp olive oil, divided

1 tsp dried thyme

1/2 tsp fine sea or kosher salt

1 lb baby red potatoes, cut into 1-inch chunks

1 15-oz can chickpeas, drained well, but not rinsed

2 cloves garlic, minced

1 lemon, sliced

freshly cracked black pepper, to taste

Heat 1 tablespoon oil in a large skillet over medium heat. Add potatoes, thyme, and salt, and stir to combine. Let cook, undisturbed, 4-5 minutes. Reduce heat to medium low, toss, and let cook another 8 minutes, tossing only every 3-4 minutes. The potatoes should be well browned.

Make a well in the center of the skillet and add the remaining teaspoon oil. Add chickpeas and let cook, undisturbed, 2 minutes. Toss everything in the skillet together, then sprinkle on the garlic evenly, and top with the lemon slices. Reduce heat to low, cover, and cook, undisturbed, until potatoes are tender, 10-12 minutes. (The moisture from the lemon and keeping the pan covered should prevent everything from sticking, but if you run into trouble, use water a tablespoon at a time to scrape loose any stuck bits.) Discard lemon slices, stir in freshly cracked black pepper, to taste, and serve hot.

Comment

Comment

Dead Simple Sweet & Spicy Johnnycakes

Hey, welcome. Consider following MSV on Twitter and subscribing to the RSS feed, or sign up for email updates right over here.

If you can get yourself in the mood for a little variety and temporarily suspend the notion that simplicity is most of the magic of Johnnycakes, then we can have a charming little breakfast.

You'll still get the core Johnnycake experience of crunchy cornmeal and irresistibly toasted edges under maple syrup, but you'll also enjoy a bonus of sweet raisins, gently warming chile powders, and fragrant pecans. Fruit and spice make everything nice.

This recipe makes two short, satisfying stacks, but you should have no problem doubling the recipe if you need to feed more folks. Or halving it to feed one, for that matter.

And of course, these are way easy to put together. Prunes also work gorgeously here if you have time and energy to cut them into small bits, but raisins and store-bought pecan pieces keep you from having to chop anything at all, making this nicely garnished plate a total snap.

Dead Simple Sweet & Spicy Johnnycakes

Print the recipe

yields 6 app. 4-inch cakes

1 cup cornmeal

2 tsp turbinado (or brown sugar)

1 tsp ground cinnamon

1/2 tsp baking powder

1/4 tsp table salt

1/4 tsp mild chile powder, such as ancho, or a blend

1/8 tsp chipotle powder

1/2 cup raisins

1 cup unsweetened soy milk (plus more, if needed)

3 TBSP chopped pecans

2 tsp coconut oil

maple syrup (grade B preferred), to serve

nondairy butter, to serve, optional

Heat a nonstick griddle (or large pan) over medium heat.

Meanwhile, in a medium mixing bowl, whisk together cornmeal, sugar, cinnamon, baking powder, salt, and chile powders. Add raisins and stir. Measure out milk and set aside.

When the griddle is hot, add pecans and toast, tossing frequently, until fragrant and beginning to darken, about three minutes. Transfer to a plate and set aside.

Add coconut oil to griddle. Add milk to ingredients and whisk to combine thoroughly. Use a quarter-cup measure to scoop out scant quarter-cup portions of batter and add to griddle. (If using a pan, you may need to cook in two batches. Add a little extra milk to the second batch before cooking, if needed, as the batter will thicken as it stands.) Cook until the edges begin to darken and bubbles appear all over the surface, about three minutes. Flip and cook another three minutes until cooked through and deep golden on the exterior.

Serve immediately, topped with pecans, with maple syrup and nondairy butter, if desired.

Comment